Crafts 🟥✂
now browsing by category
Snip snip! make all the cooolest origami and crafts here! Oh no! it is my friend’s birthday and I-I have no gift! I know, I will learn origami from here!!! Problem solved👍
How to make a paper butterfly!
Hi guys and welcome to a brand-new post! Today, I am going to be making a paper origami butterfly! 🦋 Just follow along with the super simple steps and in 5 minutes, you will be holding a beautiful butterfly in your hand. Let’s start!
Step 1- Make sure your origami paper is a square shape. Then fold it in half 2 times
Step 2- Fold diagonally twice now.
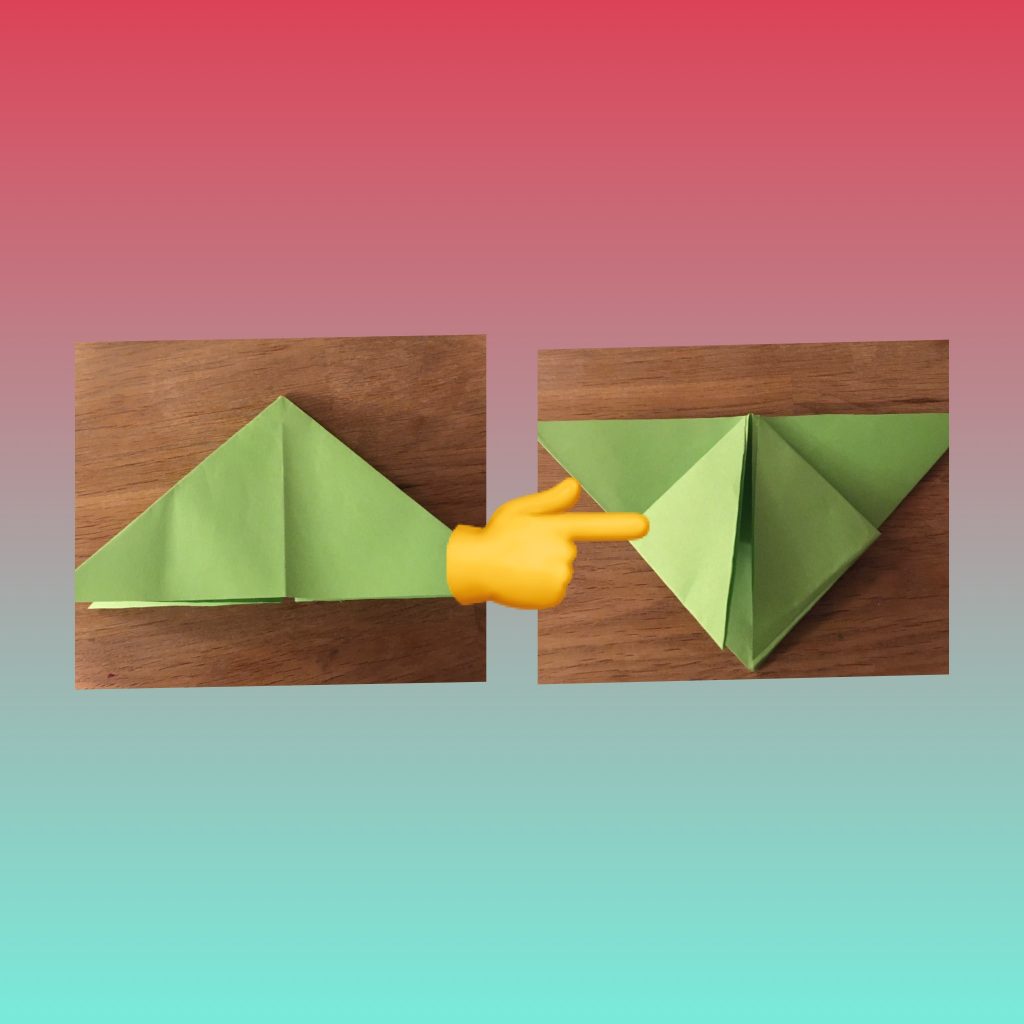
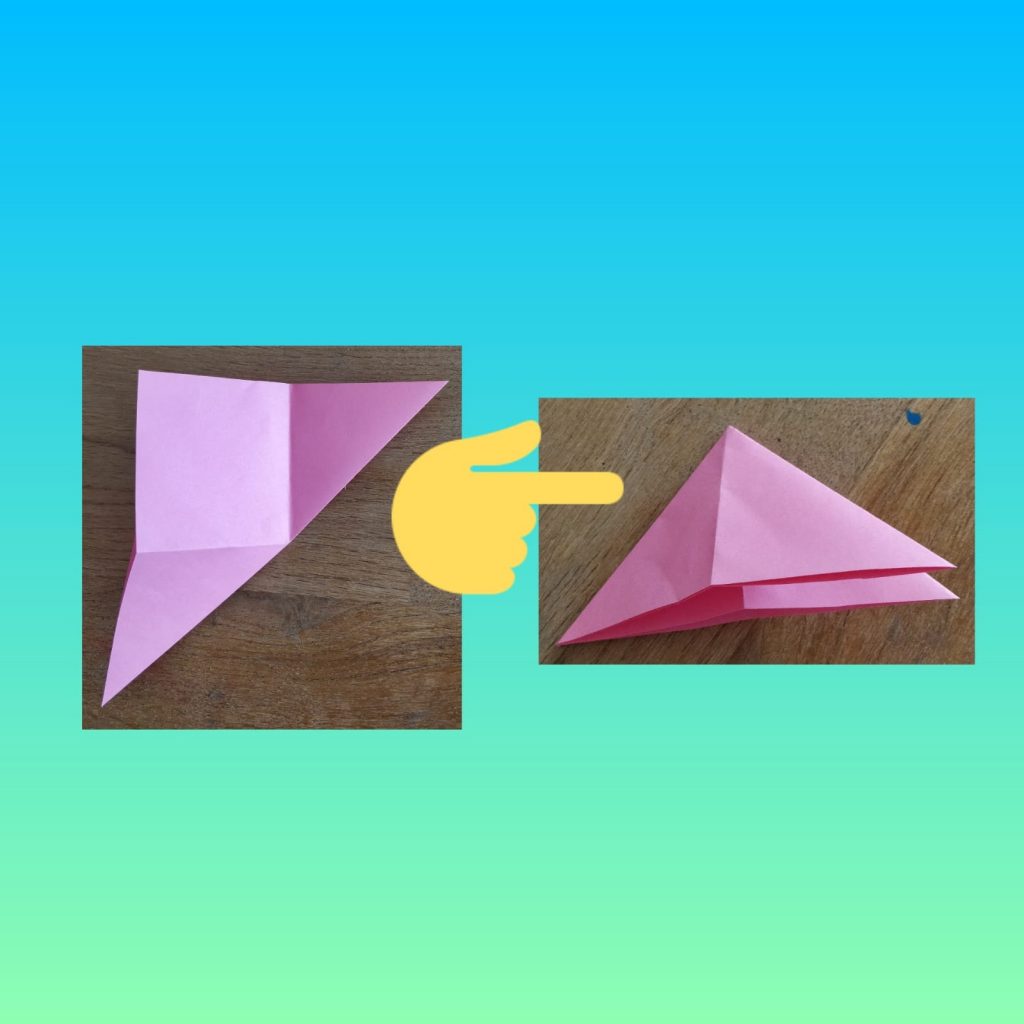
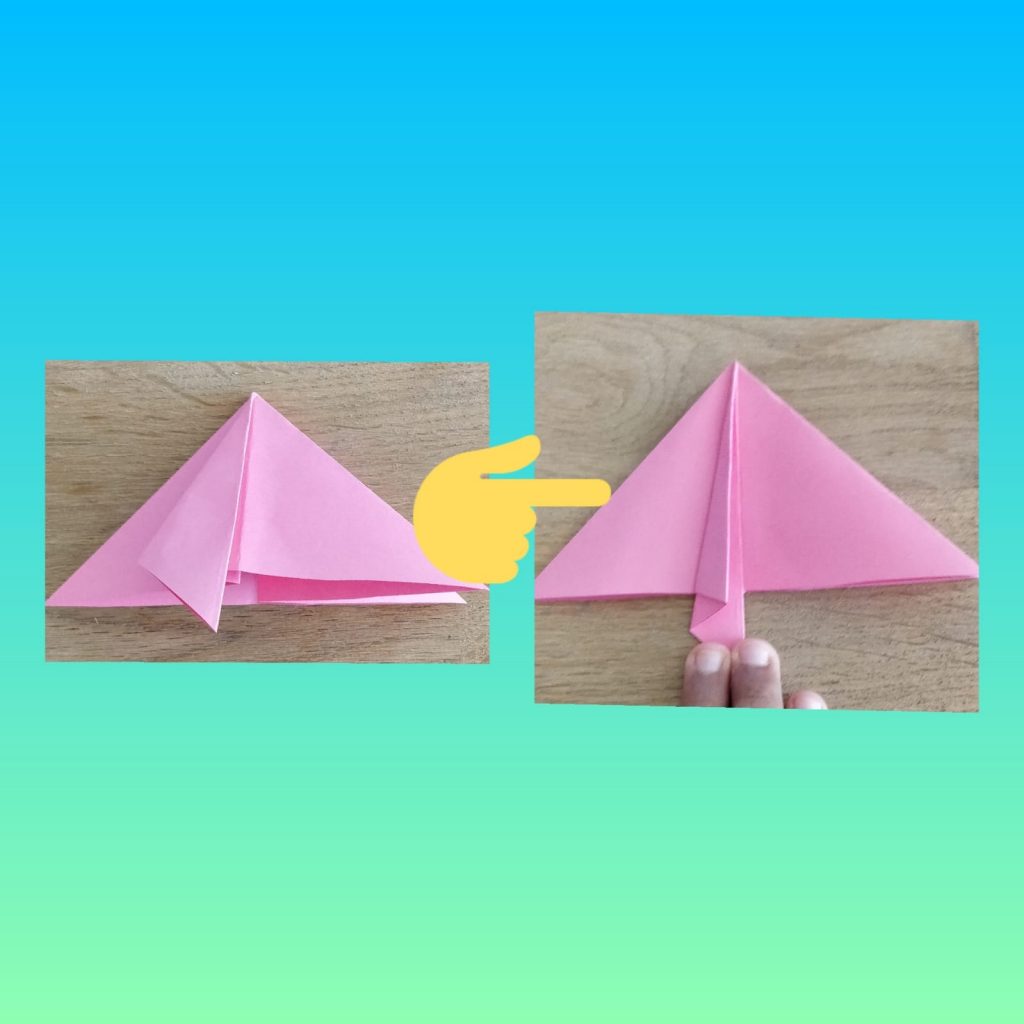
Step 4- Bring the horizontal crease down, so that it forms a triangle
Step 5- Make sure that you can see the two sections of the triangle. Next, fold one flap down and that should form a mini triangle (you should be able to see the other side of the triangle behind.)
Step 6- If you want the butterfly’s wings to be curved, cut the behind edges so that it is in a curved shape. If you want the butterfly’s wing to be pointy, skip to the next step.
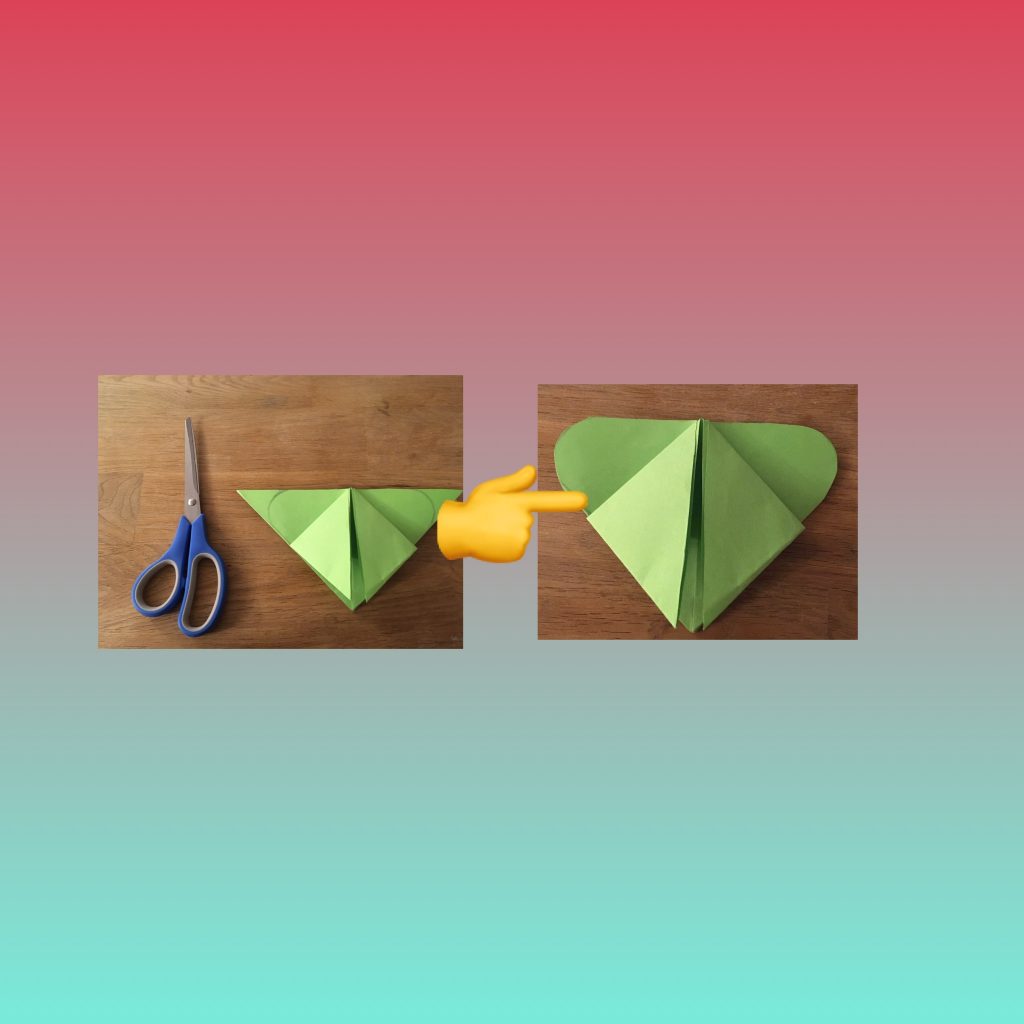
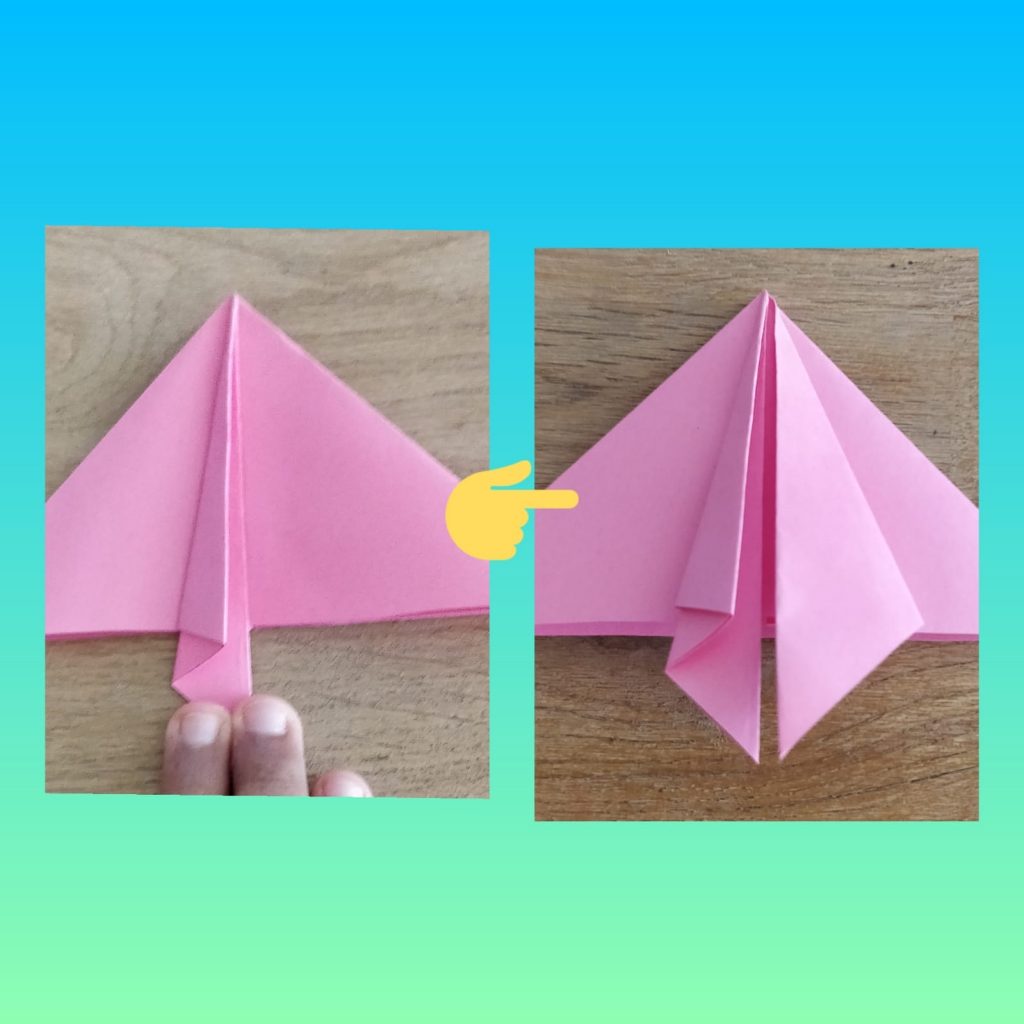
Step 7- Take the down-facing point of your triangle and pull it backwards.
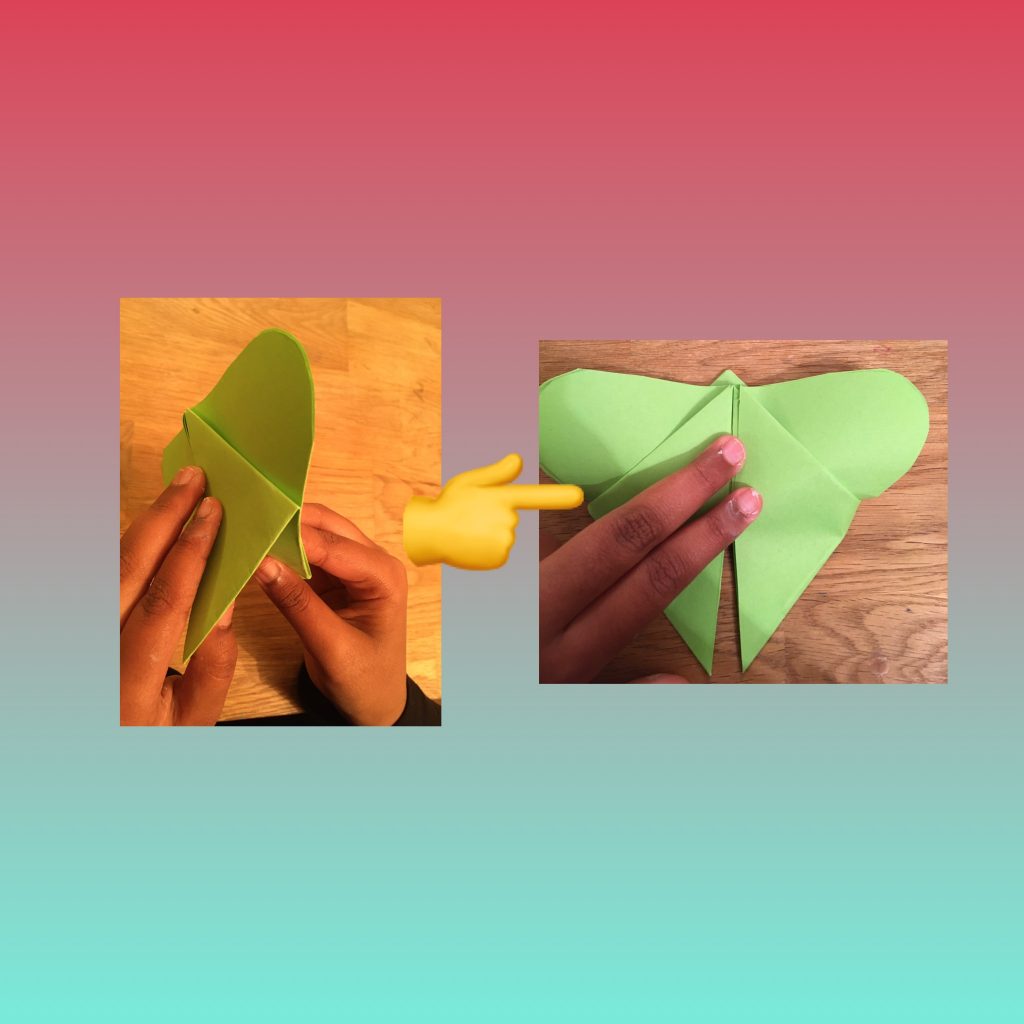
Step 8- Make sure you can see a little point behind your folded side of the triangle and then fold it forwards. If you want, you can glue the flap down too.

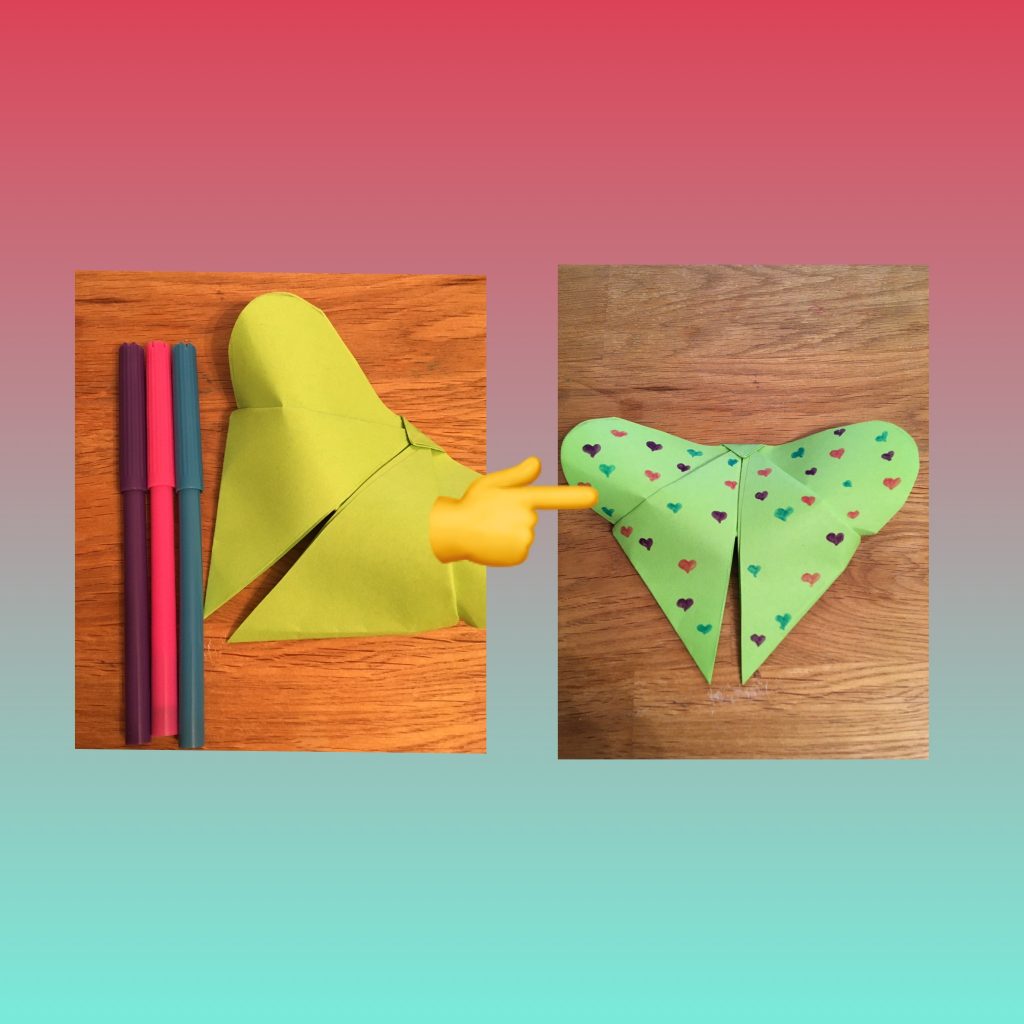
Step 9- Now time to decorate your butterfly! When you are finished, you have made a beautiful butterfly!!!
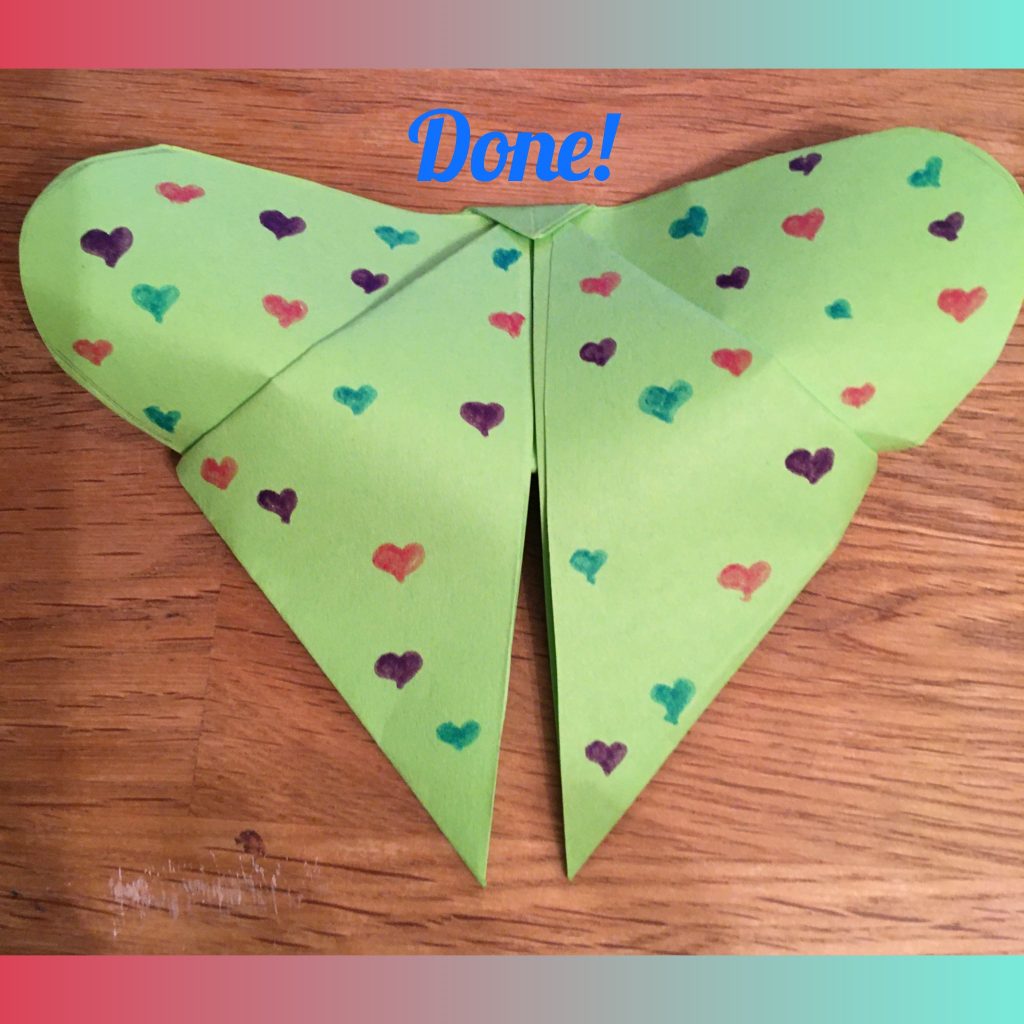
Thank you very much for reading! I hope you made a fantabulous butterfly!
How to make an origami fish

Hi! Today I’m going to teach you how to make an origami fish in 12 super-easy steps!
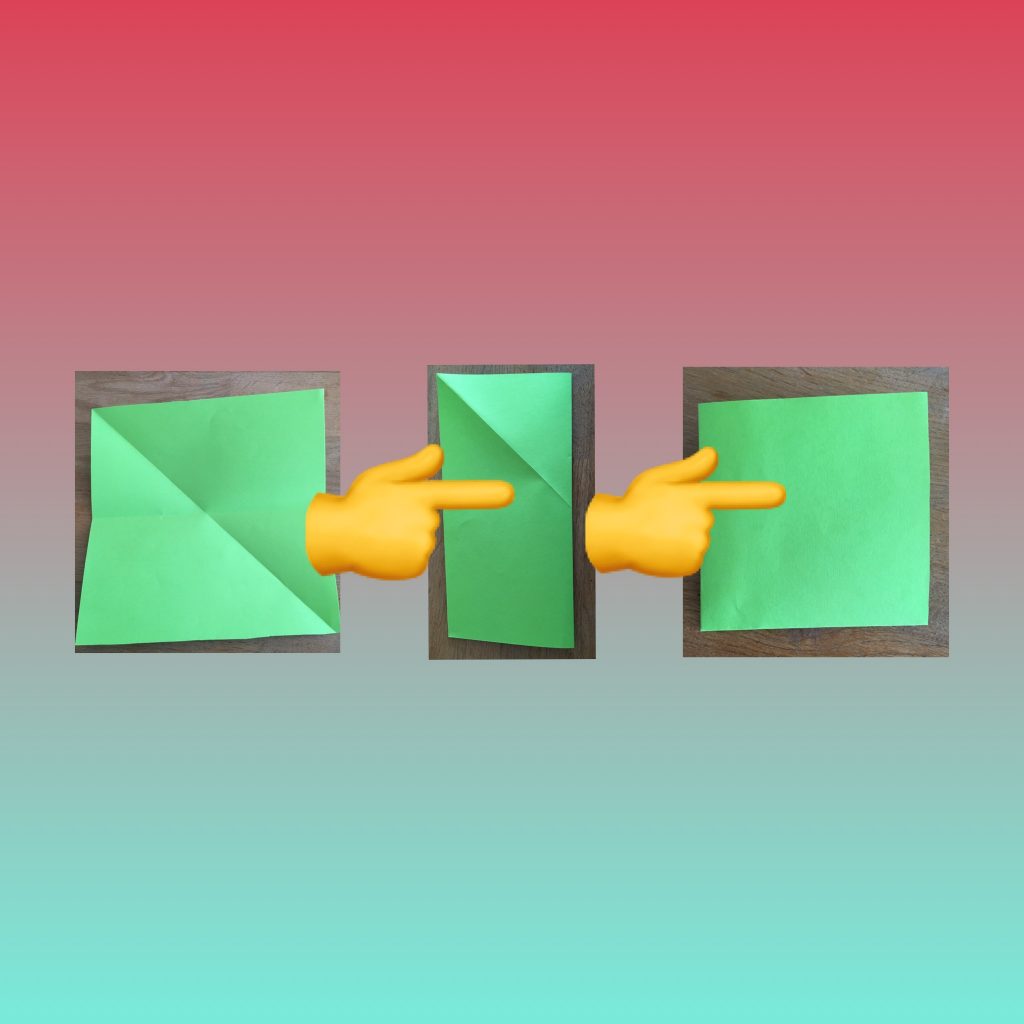
Step 1- Fold a square piece of paper in the middle to make a rectangle.
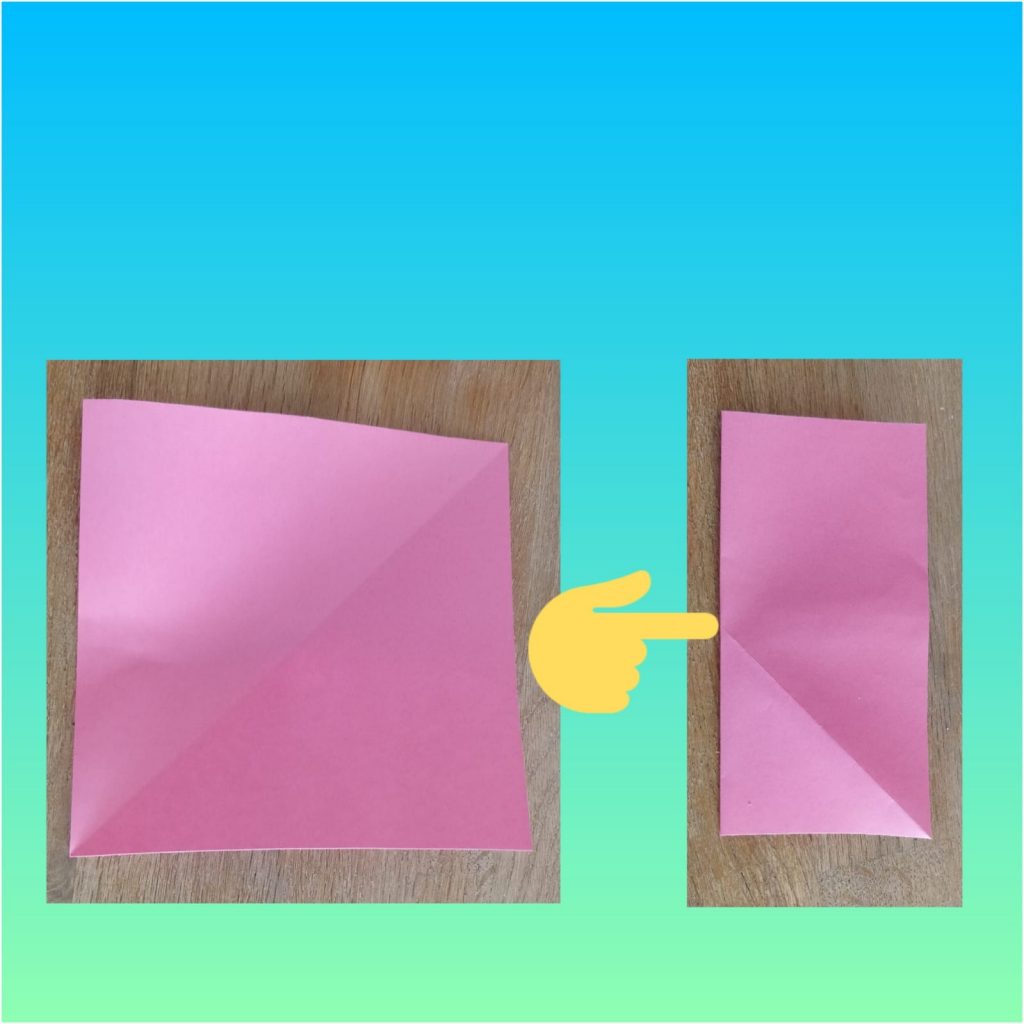
Step 2- Fold it again to make a smaller square.
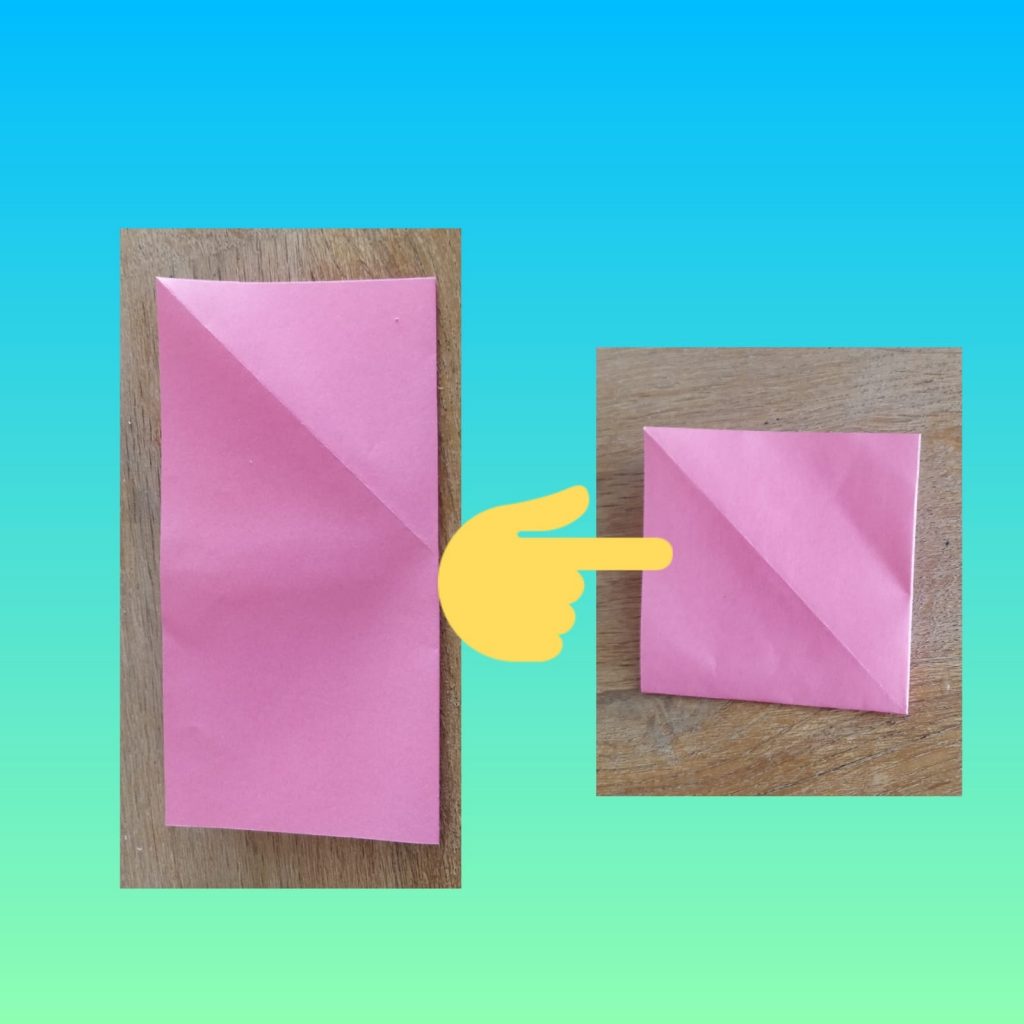
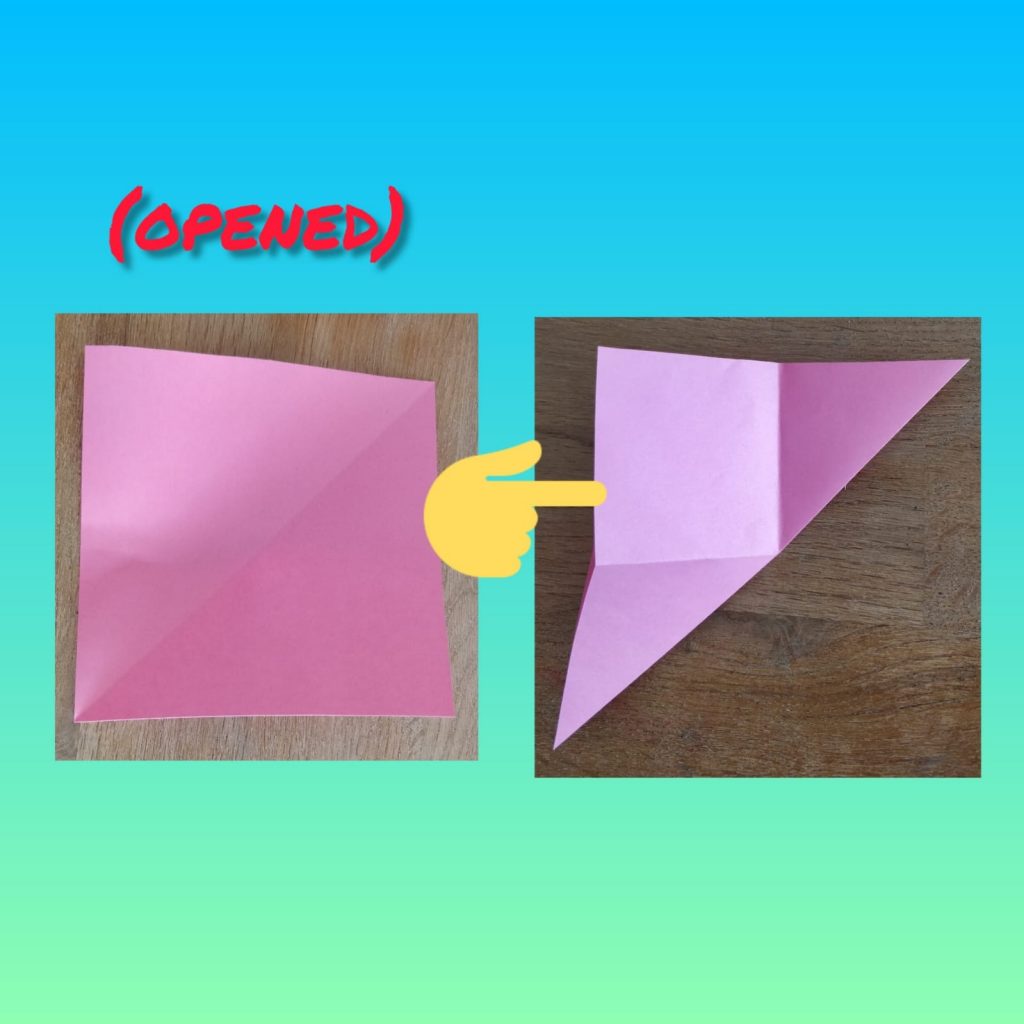
Step 3- Now open it up and fold it diagonally so it becomes a triangle.
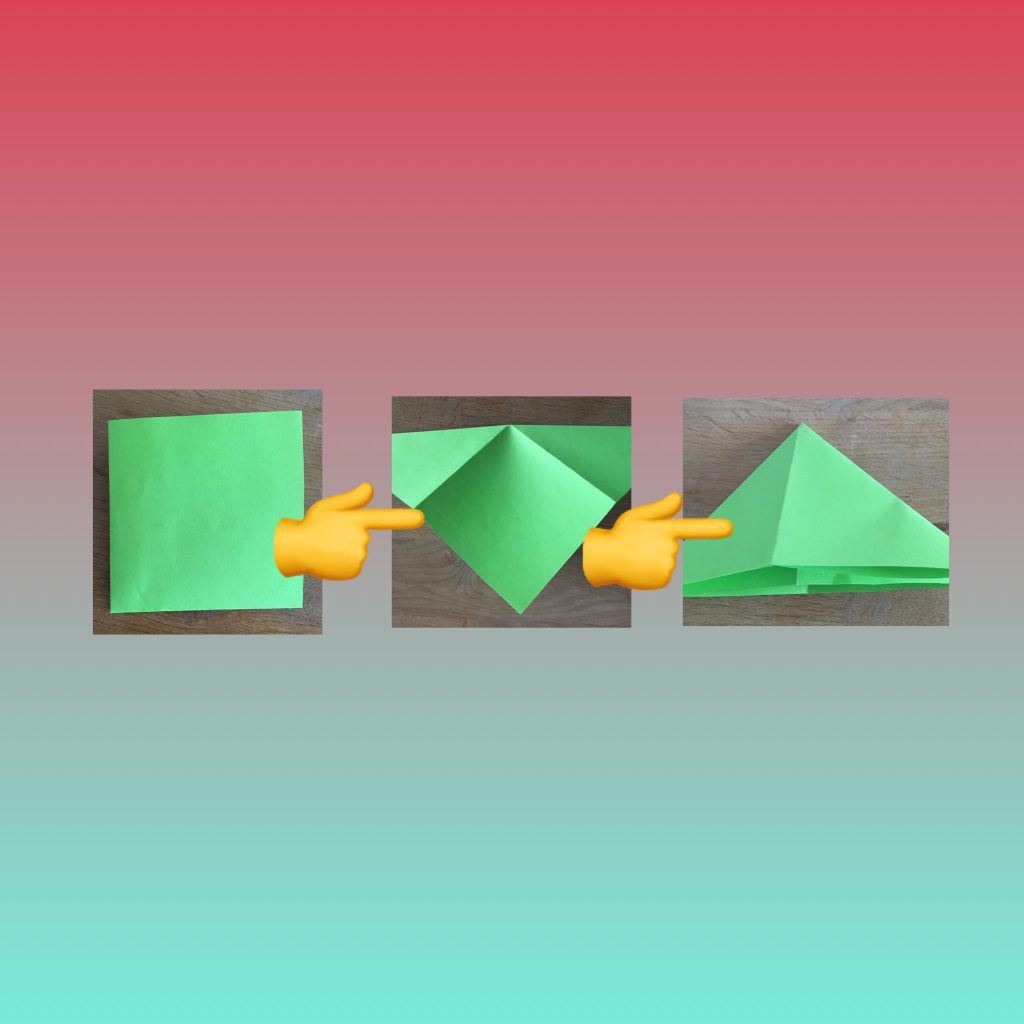
Step 4- Fold it again so it becomes a smaller triangle. (You can trim the excess off if you want to).
Step 5- Now open it up. After you’ve done that, take the horizontal fold and pull it down.
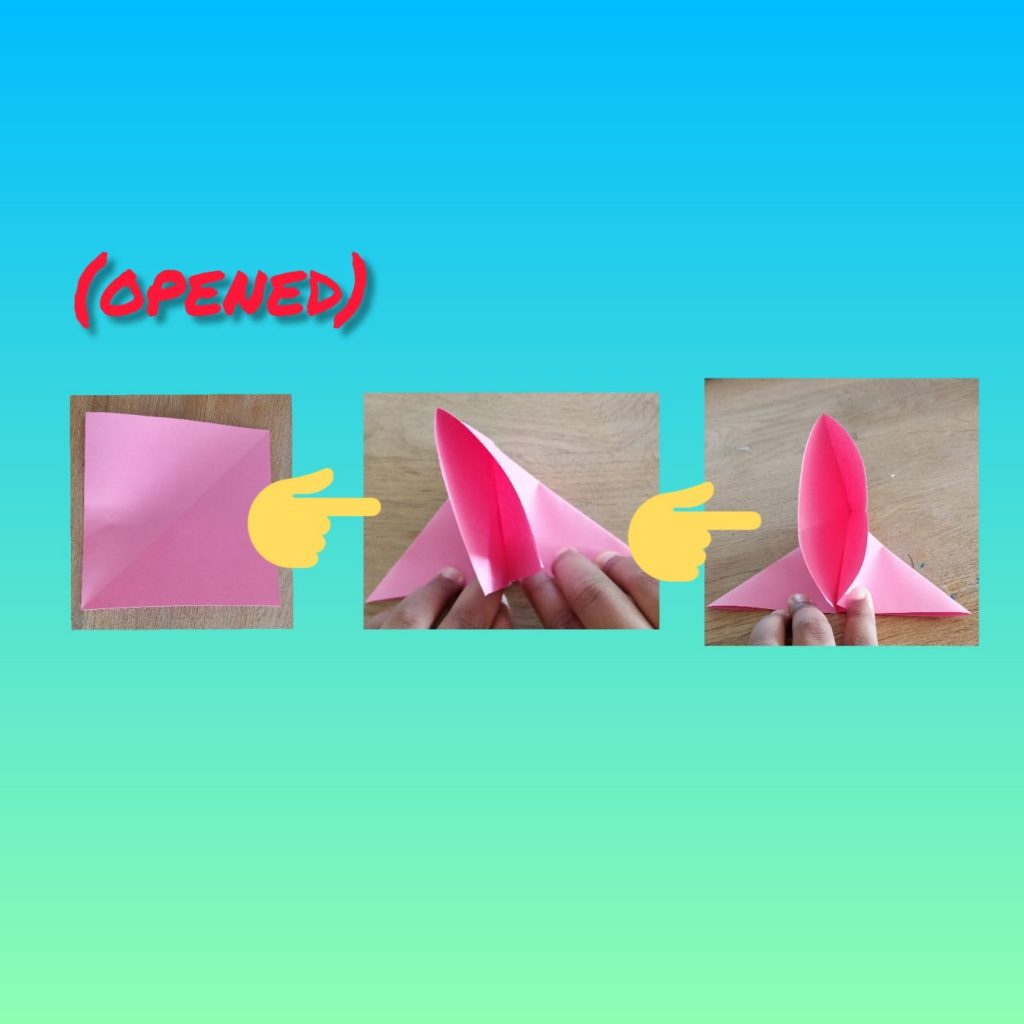
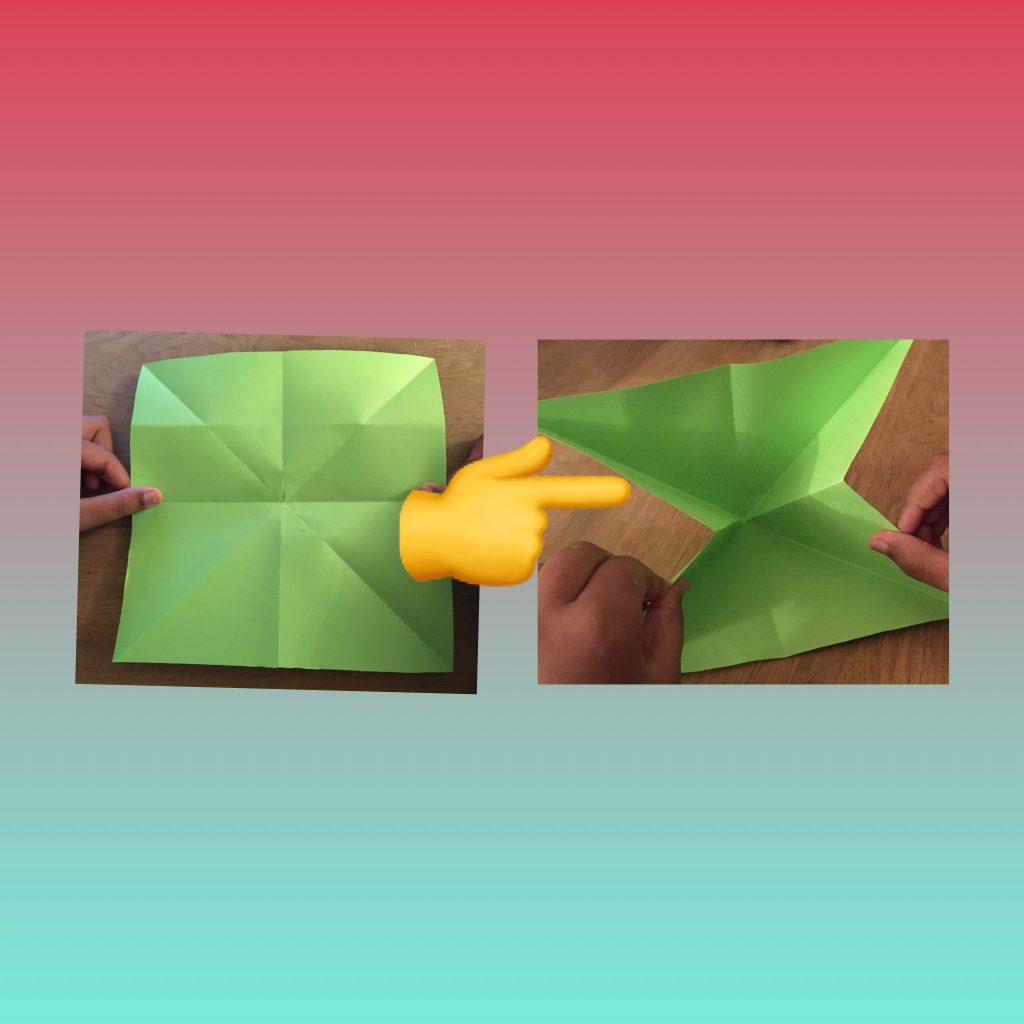
Step 6- Next, pull the top part down and after you do that, it will look like 2 triangles joined at the top. You can also cut the excess off.
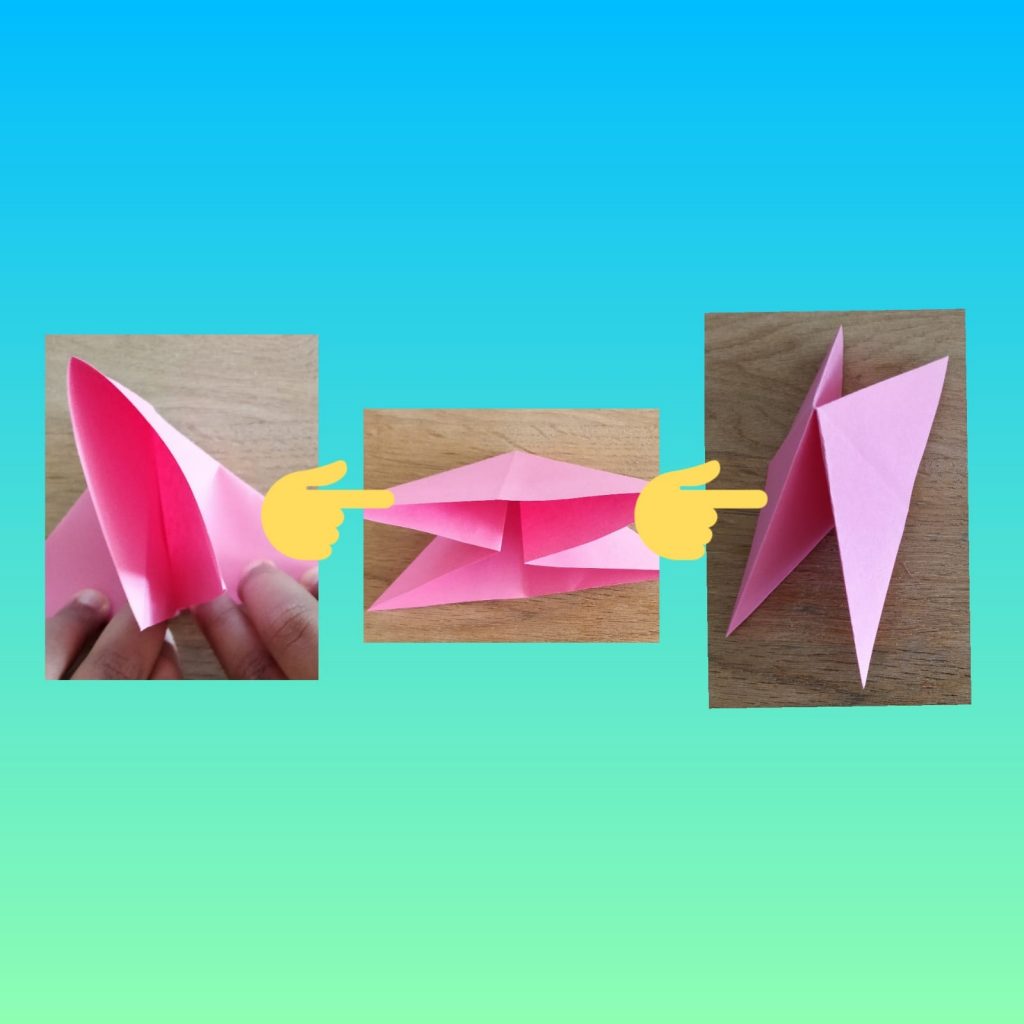
Step 7- After you have done that, fold 1 half of the triangle down. The other triangle should not be folded.
Step 8- Now fold it again and press the crease hardly.
Step 9- Next, fold the other half of the triangle down the centre line.
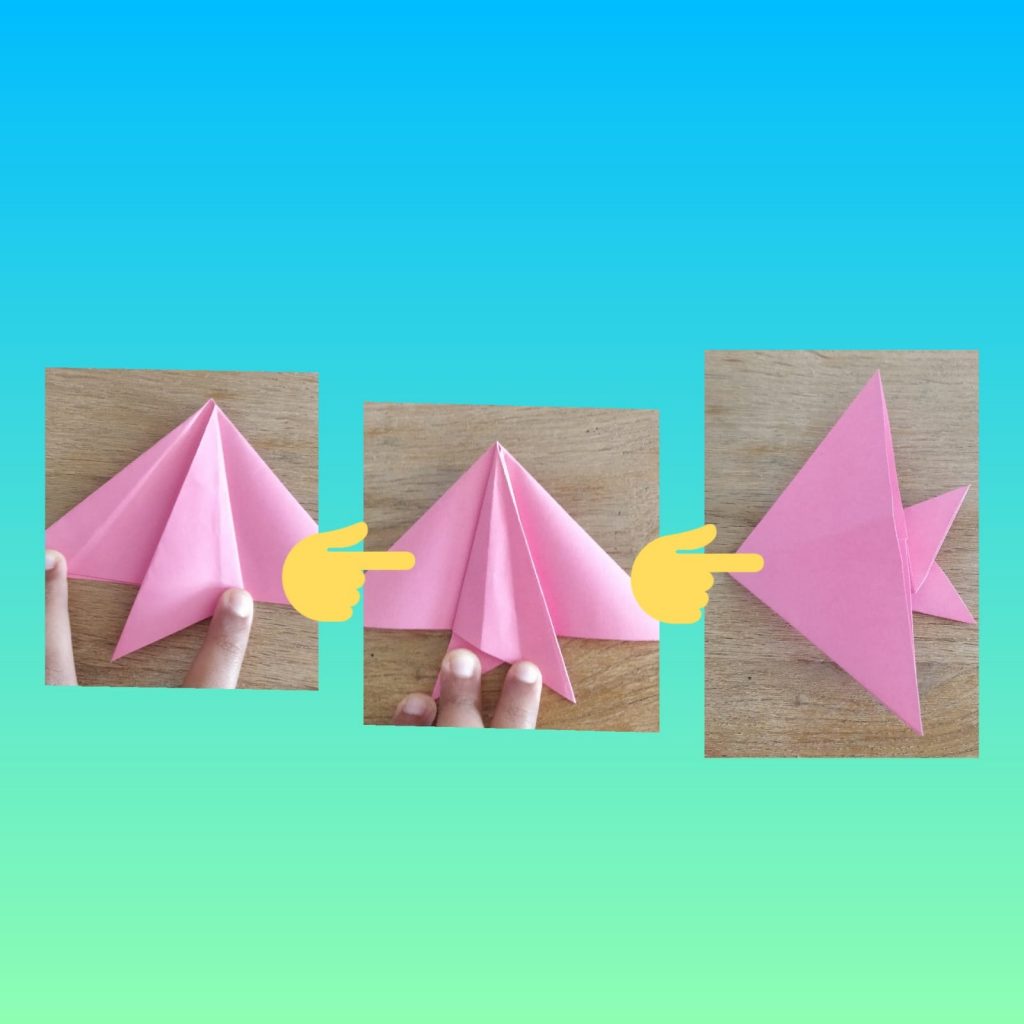
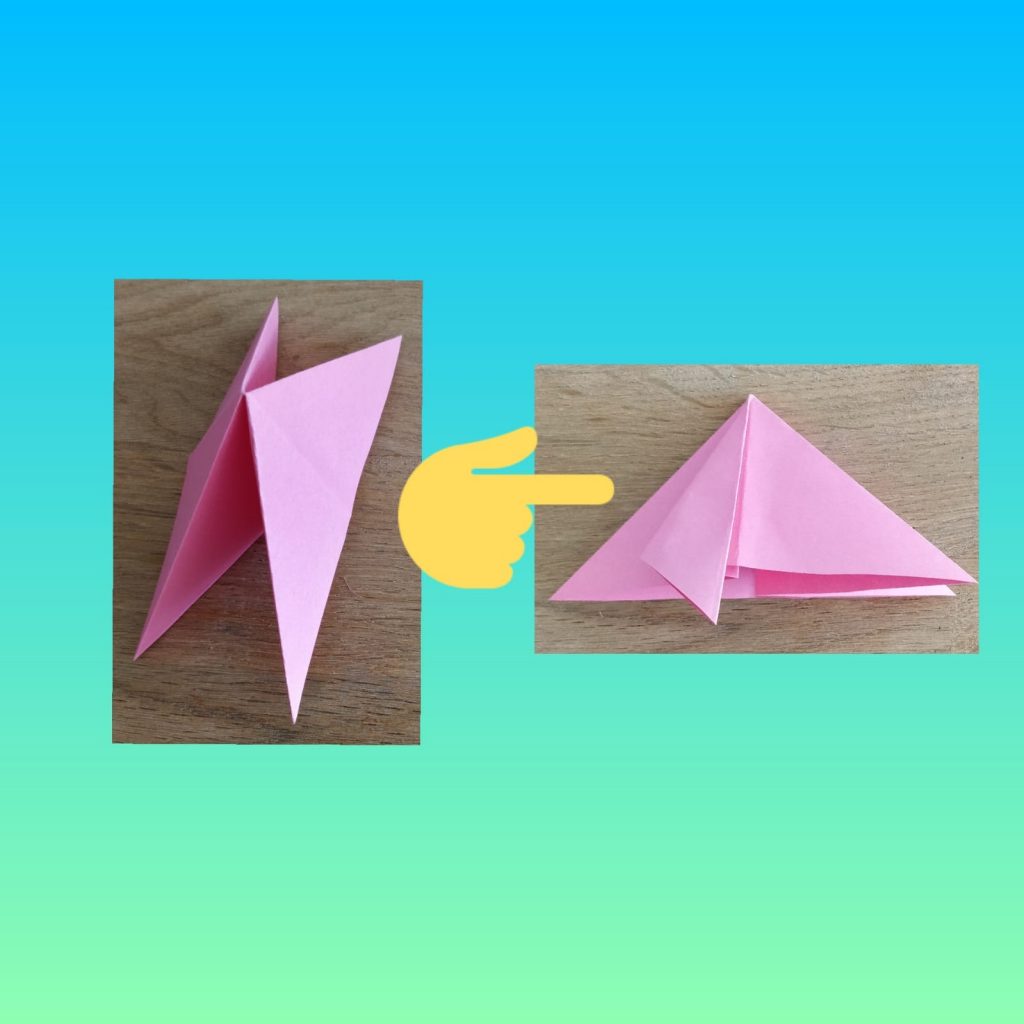
Step 10- Then, open the halves you have folded. Now, you can see 3 lines on the left (or whichever side you folded twice).
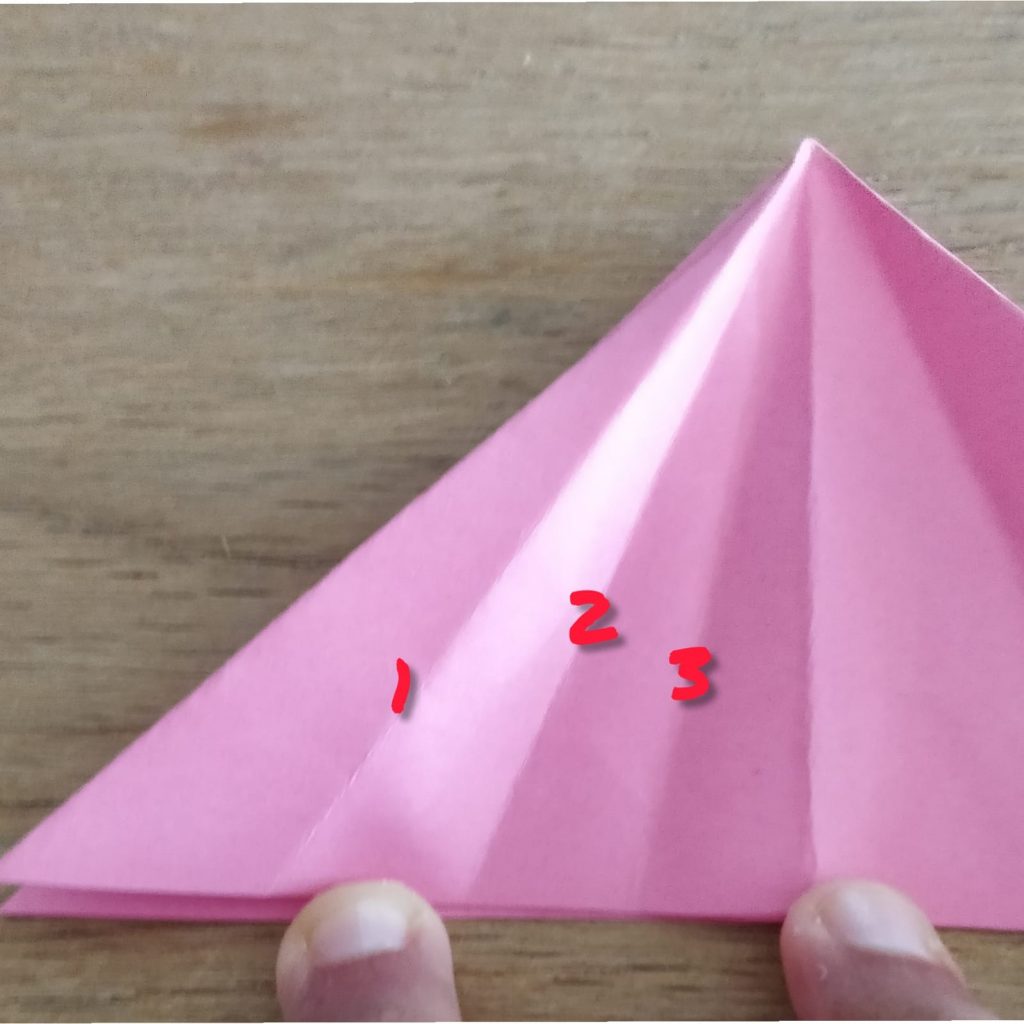
Step 11- After you have seen the lines, fold the other half on the 3 (I have named the creases in the picture above) crease.
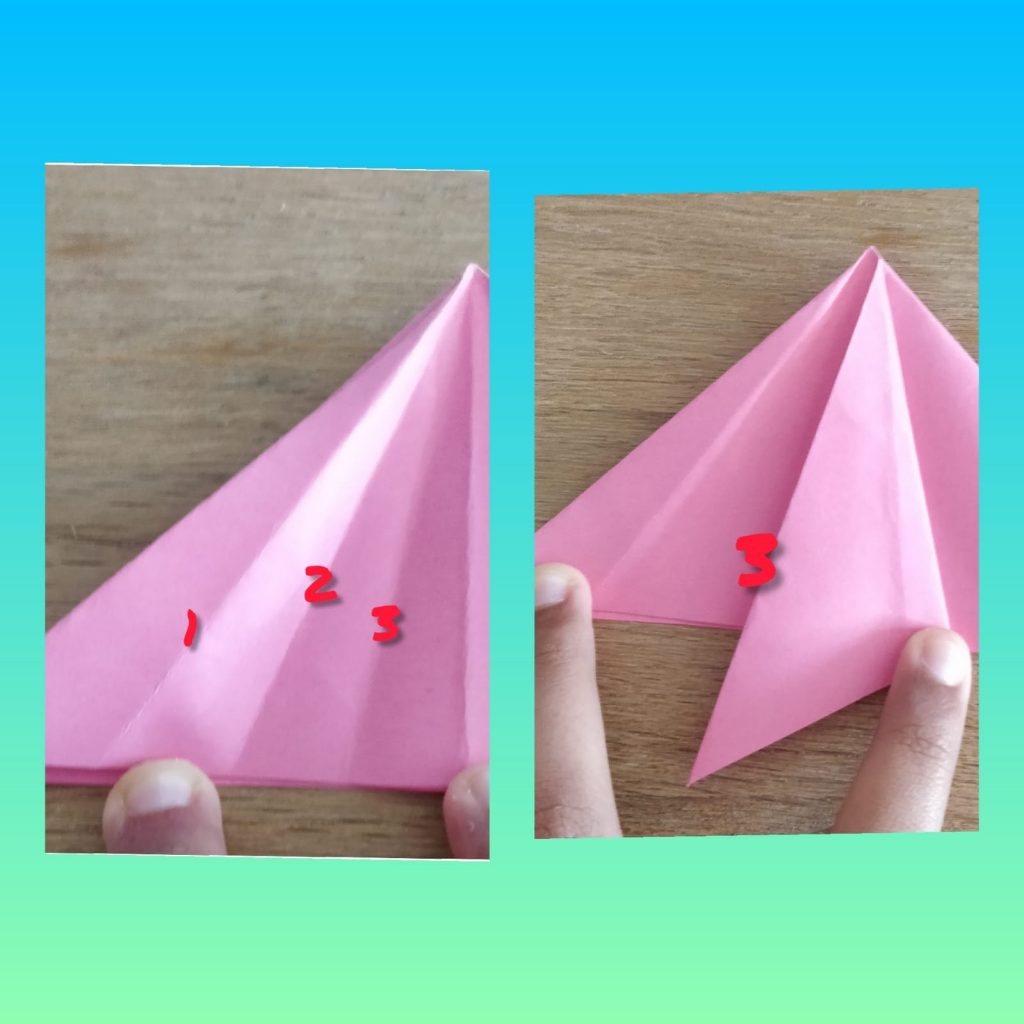
Step 12- Now, fold the opposite half back again. And lastly, turn it over and draw eyes on your fish. And now your fish is finished!